A sharp pop, an empty feeling in the back of the ankle, and suddenly even taking a step feels impossible, an Achilles tendon rupture can sideline anyone from rec-league basketball players to daily dog-walkers. Once the diagnosis is confirmed, the real concern shifts from “What happened?” to “How do I get back to normal?” This guide lays out a clear, evidence-based roadmap for the entire 12-month recovery journey, whether you opt for surgery or a non-operative protocol.
Here’s the big picture: most patients transition from crutches to independent walking by weeks 10–16, ease into light jogging around month six, and regain clearance for cutting or jumping sports between months nine and twelve. Age, general health, and how faithfully you follow rehab milestones all influence those dates, but a structured plan is your best insurance against re-rupture and lingering weakness. In the pages that follow you’ll find phase-by-phase timelines, exercise progressions, red flags to watch for, and lifestyle tweaks, everything you need to move from the initial setback to confident, pain-free motion.
Recognize the Severity: Immediate Actions and Diagnosis
The first few hours after a tear set the tone for the entire achilles tendon rupture recovery process. Acting quickly helps limit swelling, protects the damaged fibers, and gives your medical team clear information for building a rehab plan. Below you’ll learn how to spot a full rupture versus a milder strain, what to do before you reach a specialist, and how doctors decide between surgery and modern functional-rehab protocols.
Typical Symptoms & Red Flags
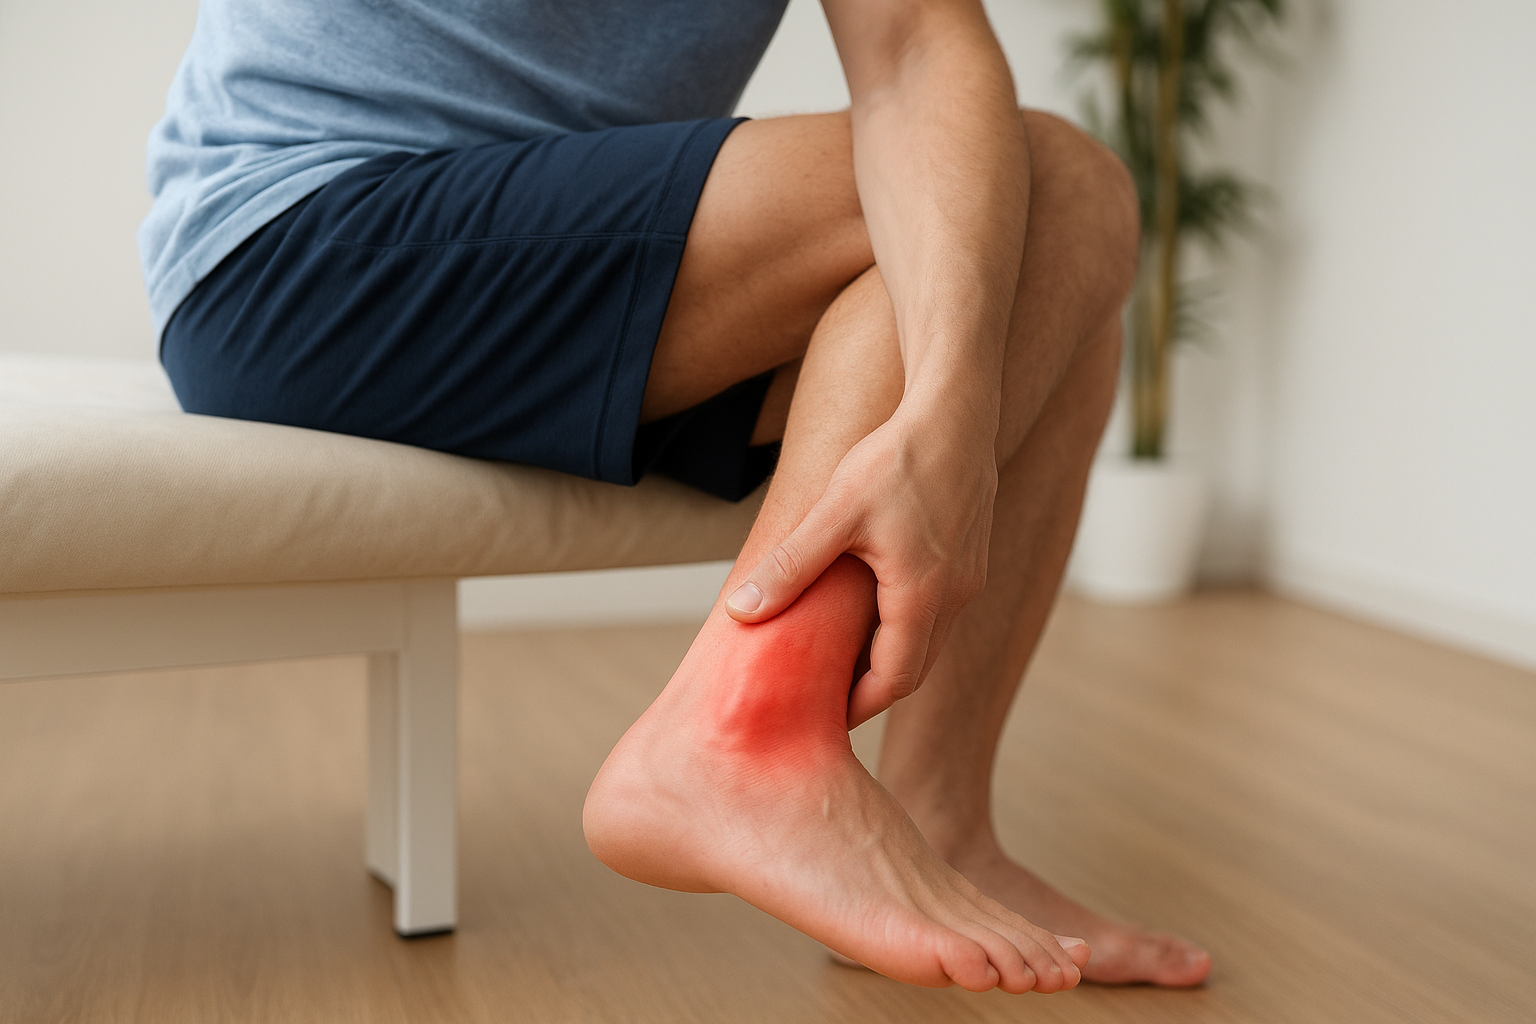
Most patients describe a sudden “pop” or the sensation of being kicked in the calf, followed by sharp pain and immediate weakness. Classic signs include:
- Inability to push off the ball of the foot or perform a single-leg heel raise
- Visible or palpable gap 2–6 cm above the heel bone in complete tears
- Swelling and bruising that creeps toward the ankle within hours
Partial tears may still allow limited plantarflexion, but pain spikes when you attempt to rise on tip-toe. Head to the ER or urgent care if you notice any of these red flags:
- Total loss of plantarflexion strength
- Rapid, balloon-like swelling or numbness in the foot (possible vascular compromise)
- Calf pain paired with shortness of breath (rule out blood clot)
Achilles Tear Grades and What They Mean for Recovery Time
Not every Achilles injury is a complete rupture. Many clinics grade Achilles tendon tears on a 1-to-5 scale to help set expectations for how long recovery takes:
| Grade | What’s Torn | Typical Recovery Time |
|---|---|---|
| Grade 1 (mild strain) | Less than 25% of fibers; tendon stays intact | 2–4 weeks with RICE and a gradual return to activity |
| Grade 2 (moderate partial tear) | 25–50% of fibers | 4–8 weeks in a boot plus early physical therapy |
| Grade 3 (severe partial tear) | 50–75% of fibers; noticeable weakness | 8–12 weeks in a boot or brace with PT-driven progression |
| Grade 4 (near-complete tear) | Over 75% of fibers; often needs surgical repair | 4–6 months following a surgical or accelerated non-operative protocol |
| Grade 5 (complete rupture with retraction) | Full-thickness tear with a palpable gap | 9–12 months, following the full phase-by-phase plan in this guide |
Grades 1 and 2 rarely need surgery and usually heal with a short stint of immobilization plus physical therapy. Grades 4 and 5 behave like the classic complete rupture this guide is built around, so if that’s your diagnosis, the Phase 1 through Phase 5 timeline below applies almost exactly as written. Your podiatrist or orthopedic surgeon confirms your grade using the exam and imaging described next.
What to Do in the First 24–72 Hours
RICE remains the gold standard:
- Rest – avoid weight bearing; use crutches right away.
- Ice – 15–20 minutes every two hours, with a thin towel barrier to protect skin.
- Compression – elastic wrap from toes to mid-calf, snug but not tingling.
- Elevation – prop the leg 12-18 inches above heart level; a stack of pillows works.
Temporary immobilization helps the tendon ends approximate. A posterior splint or boot positioned 20°–30° of plantarflexion is ideal if you have access; otherwise, keep the ankle gently pointed down and still. For pain, typical adult dosing is:
- Ibuprofen 400–600 mg every 6 hours with food (max 2,400 mg/day)
- Acetaminophen 500–1,000 mg every 6 hours (max 3,000 mg/day if no liver disease)
Always verify with your physician if you have kidney, GI, or heart issues.
Imaging & Clinical Tests That Confirm a Rupture
In clinic, your provider will start with hands-on exams:
| Test | How It’s Done | Positive Finding |
|---|---|---|
| Thompson squeeze | Patient lies prone; examiner squeezes calf | No passive plantarflexion = rupture |
| Matles | Patient bends knee to 90°; ankle observed | Foot falls into neutral/dorsiflexion instead of slight plantarflexion |
If the clinical picture is clear, imaging may be skipped. Ultrasound offers a fast, cost-effective view of tendon continuity and gap size, while MRI is reserved for equivocal cases, complex partial tears, or pre-operative mapping. Both modalities guide expectations for achilles tendon rupture recovery timelines.
Choosing Between Surgical and Non-Surgical Treatment Paths
Meta-analyses show modern early-mobilization protocols narrow the re-rupture gap:
- Surgical repair: 2-5 % re-rupture, but 3-4 % infection or wound problems
- Non-surgical functional rehab: 8-12 % re-rupture, virtually no surgical risk
Who tends to choose what?
- Surgery: athletes under 40, manual-laborers, or anyone needing maximal push-off strength.
- Non-surgical: patients over 60, smokers, those with diabetes or vascular disease, and the risk-averse.
Key questions to ask your surgeon:
- “Will my rehab start with early weight bearing?”
- “How many Achilles repairs do you perform annually?”
- “What is your protocol if I’m not at milestone X by week Y?”
A shared decision built on your sport demands, medical history, and personal risk tolerance ensures the most efficient, and safest, road back to the activities you love.
Phase 1 (Weeks 0–2): Immobilization and Acute Healing
The first two weeks set the foundation for the entire achilles tendon rupture recovery timeline. Your primary job is to let the injured tissue knit together undisturbed while keeping the rest of your body healthy and mobile. Think of this phase as damage control: minimizing swelling, protecting the repair (or natural clot if you skipped surgery), and preventing secondary issues like blood clots or de-conditioning.
Goals of Phase 1
- Protect the rupture/repair site from stretch or sudden load
- Keep pain at or below 3 / 10 at rest
- Reduce visible swelling by roughly 30 % from day-one girth
- Maintain cardiovascular fitness (upper-body ergometer, seated exercises)
- Stay independent in basic self-care without violating weight-bearing rules
Expected milestones by day 14: you can perform gentle toe wiggles inside the cast/boot, report less throbbing at night, and keep the leg elevated comfortably for 30 minutes without numbness.
Casting vs Functional Bracing
| Method | Typical Ankle Position | Pros | Cons |
|---|---|---|---|
| Short-leg cast | 20°–30° plantarflexion | Rigid protection; ideal after open repair | Poor hygiene; no early ROM; heavier |
| Removable CAM boot + heel wedges | Start at 20°–25° plantarflexion, adjustable | Allows wound checks, gentle ankle pumps, safer showering | Requires patient compliance; slightly less rigid |
Weight-bearing status varies by protocol:
- Surgical patients are usually non-weight bearing (NWB) with crutches for the full two weeks.
- Many non-operative programs allow toe-touch (≈10 % body weight) starting day 3, provided the boot stays locked.
Pain and Swelling Control
- Ice: 15 min on, 45 min off during waking hours; wrap the cold pack in a thin towel.
- Compression: elastic bandage or boot liner snug from toes to mid-calf, check cap refill to avoid cutting off circulation.
- Elevation: foot 12–18 in (about two pillow heights) above the heart; recliner positions rarely get you high enough.
- Meds:
- Ibuprofen 400–600 mg every 6 hrs (max 2,400 mg/day) if your GI and kidneys are healthy.
- Acetaminophen 500–1,000 mg every 6 hrs (max 3,000 mg/day).
- Avoid combining NSAIDs with blood thinners unless your physician okays it.
Mobility Precautions & Daily Living Tips
- Crutches: lead with the injured leg and crutches together, then follow with the good leg (“bad goes to heaven” mnemonic for stairs). Keep elbows close to your sides to spare your wrists.
- Bathing: use a cast cover or heavy-duty trash bag sealed above the boot; a shower chair reduces slip risk.
- Sleeping: place a small rolled towel under the boot heel so the toe points slightly down, preventing accidental dorsiflexion against the mattress.
- Work-from-home setup: elevate the leg on a footstool, set a phone timer for hourly calf pump reminders, and keep frequently used items within arm’s reach to limit hopping around.
Nail these basics now and you’ll roll into Phase 2 with lower pain, a calmer ankle, and the confidence that your achilles tendon rupture recovery is already moving in the right direction.
Phase 2 (Weeks 2–6): Protected Weight-Bearing and Gentle Range-of-Motion
With the acute inflammation winding down, the focus of achilles tendon rupture recovery shifts from strict protection to carefully re-introducing load and motion. Collagen fibers laid down in Phase 1 need controlled stress to organize along the direction of pull; too little and they stay weak, too much and they can tear. Expect to live in your boot most of the day, but you’ll progressively unload the crutches, start ankle pumps, and take your first tentative steps.
Weight-Bearing Progression Timeline
Clinics vary, yet most modern protocols green-light partial weight bearing (PWB) between weeks 2 and 3. Answering the common query “When can I walk after an Achilles rupture?”, you’ll usually start with about 25 % of your body weight, adding 15–20 % each week as comfort and swelling allow. Use the table below as a reference; always default to your surgeon or PT’s specific plan.
| Week | Boot Position (Heel Wedges) | Target % Body-Weight on Injured Side | Assistive Device |
|---|---|---|---|
| 2 | 20°–25° PF, 3 wedges | Toe-touch / 10–15 % | 2 crutches |
| 3 | 20° PF, 2 wedges | ~25 % | 2 crutches or walker |
| 4 | 15° PF, 1–2 wedges | 40–50 % | 1 crutch on opposite side |
| 5 | 10° PF, 1 wedge | 60–75 % | Cane as needed |
| 6 | Neutral (0°), no wedge | 90–100 % in boot | None indoors |
PF = plantarflexion.
Tips for success
- Keep the boot snug; heel lift inside the liner signals it’s too loose.
- Use a bathroom scale to “feel” the prescribed load before walking.
- Log daily distances in a phone note to catch swelling spikes early.
Early Range-of-Motion (ROM) Exercises
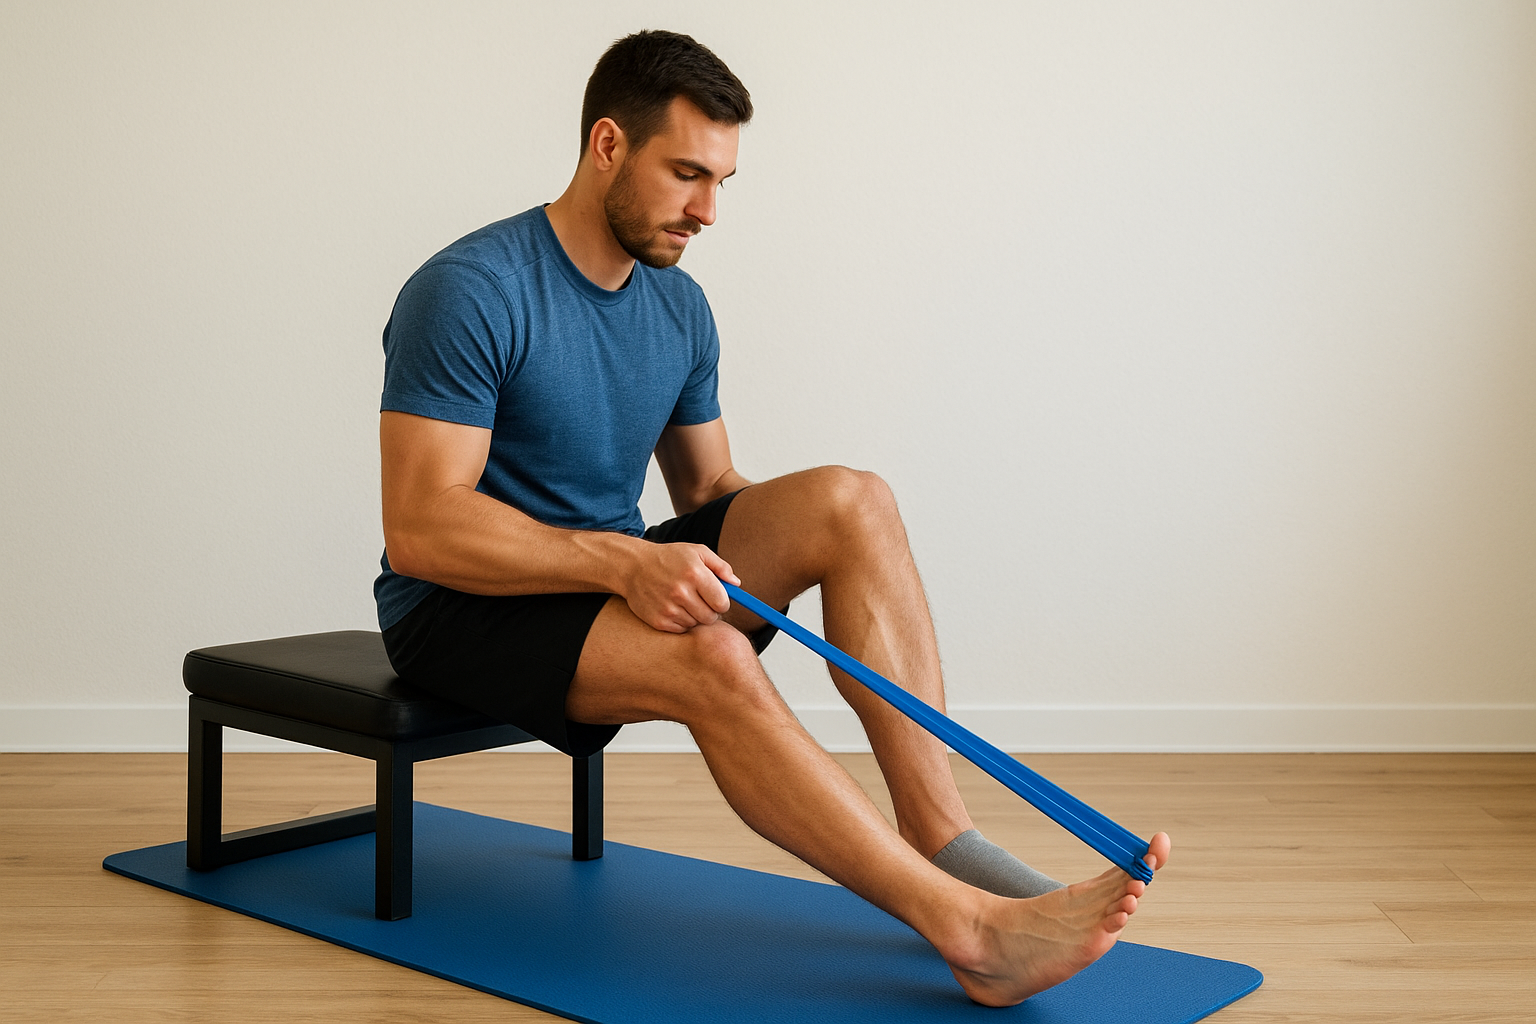
Start once sutures are removed and the incision looks dry:
- Seated ankle pumps: 3 × 20, staying within pain-free plantarflexion.
- Ankle alphabet: trace A–Z twice, boot off but foot supported.
- Towel-assisted plantarflexion stretch: gentle 5-second holds, 10 reps.
Pain ceiling: stop or back off if discomfort exceeds 3/10. In the boot, you can loosen straps briefly for these drills, then lock back down before standing.
Monitoring Wound/Incision Care
Look daily for:
- Redness extending >½ inch beyond edges
- Thick yellow drainage or foul odor
- Fever over 101 °F
Dressings generally stay on 48 hours after stitch removal, then a light gauze pad is enough. If you spot any of the above, call your provider, early antibiotics beat a delayed setback every time.
Preventing Re-Rupture
Most re-tears occur during this “feels better, but isn’t strong yet” window. Safeguards:
- Boot compliance: wear it even for midnight bathroom trips.
- No barefoot walking, ever, until cleared.
- Use even, slow steps; avoid quick pivots or toe-off propulsion.
- Elevate after each activity block; swelling equals tissue stress.
Quick stat: studies from NYU Langone show up to a 3-fold increase in re-rupture when patients ignore brace guidelines. Respect the timeline now, and you’ll reap the reward of faster, safer progress later.
By the end of Week 6 you should be ambulating household distances in the boot without crutches, possess at least 10° of active plantarflexion, and have a calm incision, all green lights for entry into Phase 3’s strength re-education.
Phase 3 (Weeks 6–12): Strength Re-Education and Gait Training
Collagen is now maturing and beginning to bear load, which means the “no-stress zone” of early healing is officially over. Phase 3 focuses on waking up the calf complex, restoring a normal walking pattern, and convincing your brain that the repaired tendon can be trusted again. Progress is often rapid during this window, but tendon fibers are still weaker than their healthy counterpart, and over-zealous hopping or ditching the boot too early is a common reason achilles tendon rupture recovery timelines stall.
Weaning Off the Walking Boot
Before swapping the bulky boot for regular shoes, confirm all three of these boxes:
- Stand on the injured leg in the boot for 10 seconds without a wobble
- Pain ≤ 2/10 with full body weight through the boot
- Dorsiflexion within 10° of the opposite side when measured by your PT
Typical wedge removal schedule
- Remove the final heel wedge at Week 6 and lock the boot in neutral
- Week 7–8: Boot on indoors, athletic shoe with a ¼-inch heel lift outdoors for short distances
- Week 9–10: Shoe inside and out; keep the boot only for crowded events or uneven terrain
Aim for a supportive sneaker or light hiking shoe, no flip-flops or high heels yet. If swelling spikes or your limp worsens, backtrack a step and give the tendon 48 hours of boot time.
Progressive Strengthening Exercises
Early strength work centers on low-load, high-repetition moves that encourage tendon remodeling:
- Theraband plantarflexion: 3 × 15 reps, moderate tension, 3-second eccentric lower
- Seated calf raises (both legs): 3 × 20, progress to single-leg by Week 10
- Standing double-leg calf raises: start with body weight, add a backpack with books for gradual resistance
By Week 12 you should comfortably perform 4 × 25 single-leg raises with full height. Any sharp pain or sudden loss of strength demands a consult, don’t push through.
Balance & Proprioception Work
A strong tendon still needs a smart nervous system. Incorporate 5–10 minutes of balance drills into every session:
| Drill | Surface | Duration/sets |
|---|---|---|
| Weight-shifts front/back | Floor | 3 × 30 sec |
| Single-leg stance eyes open | Pillow | 3 × 20 sec |
| Wobble board tilts | Board | 2 × 15 each direction |
| Single-leg stance eyes closed | Floor | 3 × 10 sec (goal) |
No board? A folded bath towel or couch cushion works fine. Perform these barefoot to maximize sensory feedback, but keep a countertop within fingertip reach for safety.
Return-to-Work Guidelines
Most desk-job employees can return as early as Weeks 2–4 in a boot, yet Phase 3 is when full productivity and normal commuting usually feel realistic. For occupations that involve prolonged standing, ladder climbs, or carrying loads over 25 lb, expect a staged comeback:
- Light duty (no lifting >10 lb): Week 8
- Moderate duty (lifting 10–25 lb, intermittent walking): Week 10
- Full duty/manual labor: Week 12–14, provided you pass the single-leg heel-raise test and can walk ½ mile in shoes without a limp
If your job requires safety boots, add gel heel lifts and ensure the toe box allows slight swelling. Frequent micro-breaks to elevate the leg reduce end-of-shift soreness and help keep the achilles tendon rupture recovery curve pointed upward.
By the end of Week 12 you should stride confidently in regular footwear, manage stairs without grabbing a rail, and hit at least 90 % of contralateral calf endurance, clear markers that you’re ready to tackle Phase 4’s higher-impact challenges.
Phase 4 (Months 3–6): Advanced Conditioning and Return to Low-Impact Sport
You’re walking unassisted, calf raises no longer feel like a circus act, and the boot is a distant memory, welcome to the “engine-building” stage of Achilles tendon rupture recovery. During Months 3–6 your tendon is tough enough to tolerate stretch–shortening cycles, yet still reorganizing on a microscopic level. The mission now is to layer in power, stamina, and confidence without outrunning tissue biology. Think patient overload, not reckless leaps.
Criteria to Enter Phase 4
Before adding impact you should meet all of the following:
- Perform 10 consecutive single-leg heel raises pain-free and to full height
- Dorsiflexion within 5 ° of the uninjured side when measured with a goniometer
- Walk 1 mile at a brisk pace with no limp or swelling spike the next morning
- Physician or physical therapist sign-off after reviewing your progress notes
If any box is unchecked, circle back to Phase 3 drills for another week and reassess.
Plyometric and Sport-Specific Drills
Plyometrics re-educate the tendon to store and release energy, a key for jogging, jumping, and quick changes of direction. Follow a simple “ground contact hierarchy”: start low, stay symmetric, progress distance before height.
- Jump rope – 2 × 30 sec, single hops, soft landings
- Mini-hops in place – 3 × 20, forward then lateral
- Box step-offs (4–6 in) – 2 × 10 each leg, focus on deceleration
- Lateral bounds – 3 × 10, land and freeze for 2 sec before the next bound
Rule of thumb: next-day soreness should stay under 3/10 and resolve within 24 hr. If it lingers, cut volume by 30 % and retry.
Cardiovascular Conditioning Options
Your heart and lungs don’t have to wait for full sprint clearance. Rotate low-impact modalities to maintain aerobic fitness while sparing the tendon:
| Modality | Weekly Frequency | Intensity Cue |
|---|---|---|
| Stationary bike | 2–3 sessions | 65–75 % HRmax |
| Elliptical | 1–2 sessions | “Can speak in short sentences” |
| Deep-water running | 1 session | 30-min continuous |
| Hiking on gentle grade | 1 session (after Month 4) | No pain ≥3/10 during or after |
Mixing surfaces and equipment reduces repetitive stress, and cross-training keeps motivation high when the weather (or boredom) hits.
Psychological Readiness & Confidence Building
Fear of re-rupture can sabotage perfect biomechanics. Gauge your mindset with the Tampa Scale of Kinesiophobia or a simple 0–10 confidence rating at each PT visit. Strategies to boost mental game:
- Visualization: spend 5 minutes picturing flawless hops and landings
- SMART goals: e.g., “Jog 10 minutes continuously by Week 18”
- Gradual exposure: practice sport skills (dribbling, swing mechanics) in a non-competitive setting first
- Celebrate micro-wins: logging new calf-raise PRs or zero-limp days reinforces progress
Remember, tissue remodeling continues for up to a year, so patience paired with progressive loading is your best insurance policy for a triumphant, and lasting, return to the court, course, or trail.
Phase 5 (Months 6–12): Full Return to Running, Cutting, and Competition
By now the tendon is roughly 80–90 % of its pre-injury tensile strength, and the calf‐muscle unit has reclaimed most of its bulk. What’s still missing for many patients is high-speed, multi-directional confidence, the last hurdle in Achilles tendon rupture recovery. This phase blends objective performance tests with a graded “return-to-play” ladder so you cross the finish line without shortcuts.
Performance Testing Benchmarks
Before green-lighting explosive drills or league play, your rehab team should document that the injured side is nearly on par with the healthy one.
| Test | Goal to Pass |
|---|---|
| Single-leg hop for distance | ≥ 90 % of contralateral limb |
| Triple hop (forward) | ≥ 90 % symmetry |
| Isokinetic plantarflexion at 60 °/s | Strength deficit ≤ 10 % |
| Single-leg heel raises (eccentric) | 25 continuous reps, pain ≤ 2/10 |
| Y-Balance composite score | ≤ 4 cm difference |
Failing a metric doesn’t doom you; it simply guides the next block of focused work.
Gradual Return-to-Play Protocol
Jumping straight into 5 k runs or pickup basketball is how re-ruptures happen. Use this 10-step plan, advance only if the tendon is pain-free during the session and the following morning.
| Step | Session Focus | Work:Rest Ratio |
|---|---|---|
| 1 | Walk 10 min, jog 1 min × 3 | 1:5 |
| 2 | Walk 5 min, jog 2 min × 4 | 1:3 |
| 3 | Continuous jog 15 min | , |
| 4 | Jog 5 min, stride 30 s × 6 | 1:4 |
| 5 | Continuous jog 25 min | , |
| 6 | Stride 45 s × 8 (flat) | 1:2 |
| 7 | Easy run 30 min + hill walk 5 min | , |
| 8 | Tempo run 20 min (75 % HRmax) | , |
| 9 | Add figure-8 and “Z” cuts, 3 sets of 8 | Self-paced |
| 10 | Full practice or scrimmage | Sport-specific |
Most athletes clear all steps in 4–8 weeks, but older or less-conditioned patients may need extra sessions per rung.
Long-Term Tendon Health Maintenance
- Eccentric calf loading: Alfredson protocol (3 × 15 reps, twice daily) for at least six months; proven to reduce tendinopathy risk.
- Progressive plyometrics: keep jump rope and bounding drills in warm-ups twice a week.
- Footwear: rotate between two pairs of supportive shoes; avoid minimalist models until hop symmetry is > 95 %.
- Orthotics/heel lifts: consider if persistent stiffness or mid-stance pain emerges.
Consistency beats intensity here, small weekly deposits maintain tensile strength far beyond the official “recovery” date.
Common Setbacks After 6 Months
Even disciplined patients can hit speed bumps:
- Insertional tendinopathy from rapid mileage spikes, dial back volume 20 %, add ice massage.
- Scar adhesions limiting dorsiflexion, use cross-fiber massage or seek instrument-assisted soft-tissue work.
- Gastro-soleus weakness revealed during hills or sprints, revisit weighted calf raises, 4 × 12 reps, 3 days/week.
- “Popcorn” swelling after hard sessions, monitor with a tape measure; > 1 cm girth increase calls for 48 hours of relative rest.
Flag persistent pain, recurrent swelling, or confidence dips with your provider promptly. Addressing issues early keeps the achilles tendon rupture recovery arc pointing forward and ensures the only thing popping from here on out is the crowd when you’re back in action.
Optimizing Recovery: Nutrition, Sleep, and Lifestyle Factors
Calf raises and wobble-board drills are only half the battle, tendons remodel around the clock, not just during PT sessions. What you eat, how you sleep, and the daily habits you keep all influence collagen cross-linking, inflammation, and ultimately how fast you hit each milestone on the Achilles tendon rupture recovery timeline.
Protein and Collagen for Tendon Repair
Tendons are roughly 80 % collagen, so giving your body the raw materials matters.
- Daily target:
1.6–2.2 g protein / kg body weight, split into 4–5 feedings. - Collagen or gelatin: 15 g mixed with a vitamin C source 30–60 minutes before rehab may boost collagen synthesis rates.
- Post-workout: aim for 25–30 g of a leucine-rich source, whey, Greek yogurt, or soy isolate, within an hour of finishing exercises.
Supplements and the Evidence
Research on tendon-specific supplements is still young, but a few options show promise alongside, not instead of, quality nutrition:
- Omega-3 fatty acids (2–3 g EPA/DHA daily) may temper excess inflammation without blunting healing.
- Creatine monohydrate (3–5 g/day) helps restore calf strength.
- Curcumin (500–1,000 mg with piperine) can reduce post-exercise soreness; evidence is moderate.
Skip trendy peptides or mega-dose vitamin E, current data don’t support them.
Sleep, Stress, and Hormonal Impact
Collagen forms during deep sleep, when growth hormone peaks. Short-changing shut-eye is like skipping half your PT sessions.
- Goal: 7–9 hours nightly; keep room temperature 60–67 °F and devices off 30 minutes prior.
- Stress control: elevated cortisol hampers fibroblast activity. Brief breathing drills (4-7-8 technique) or a short mindfulness session can reset your nervous system pre-rehab.
- Track recovery: noting resting heart rate trends helps spot overtraining before pain flares.
Smoking and Medications to Avoid
Nicotine constricts the micro-vessels that supply your Achilles, cutting off nutrients right where you need them most. If quitting cold turkey feels daunting, ask your physician about patches or prescription aids, cessation even two weeks post-injury improves blood flow metrics. Be cautious with:
- Fluoroquinolone antibiotics (e.g., ciprofloxacin) known to elevate tendon-rupture risk.
- Repeated corticosteroid injections near the repair site; they weaken collagen fibers.
Consult your care team before starting any new medication, and always disclose supplements to avoid interactions.
When Things Don’t Go as Planned: Complications and Re-Rupture Prevention
Even with meticulous rehab, hiccups happen. A little morning stiffness is normal; shooting pain or sudden loss of strength is not. Knowing the difference, and acting quickly, can keep a small detour from becoming a full-blown setback.
Signs of Re-Rupture or Infection
- Sudden “pop” followed by calf weakness or an inability to toe-off
- Rapid swelling or bruising that creeps up the leg
- Fever above 101 °F, chills, or foul-smelling drainage from the incision
If any of these show up, immobilize the ankle in plantarflexion, avoid weight bearing, and call your surgeon or head to the ER.
Scar Tissue and Stiffness Management
Adhesions limit dorsiflexion and can provoke tendinopathy. Countermeasures:
- Cross-fiber or instrument-assisted massage 3–4 × week
- Active stretching: knee-to-wall holds, 30 s × 3 sets
- Heat packs before mobility work to soften tissue
Neurological Symptoms to Watch
Tingling, burning, or numbness along the outer foot may signal sural nerve irritation or entrapment. Persistent symptoms (>48 h) warrant a neuro exam and possible imaging.
When to Seek Specialist Review
Book a follow-up if:
- Pain plateaus or worsens for two consecutive weeks
- Dorsiflexion lags >15 ° behind the other side after Month 3
- You still limp or avoid push-off beyond Month 4
Catching problems early preserves your achilles tendon rupture recovery timeline and spares you from starting back at square one.

Your Path Forward
Recovery isn’t linear. Phase 1 protects the tear; Phase 2 re-introduces gentle load; Phase 3 rebuilds strength and a normal gait; Phase 4 layers in power and low-impact sport; Phase 5 returns you to full-speed cuts and competition. Key checkpoints, walking unaided by month 3, jogging at month 6, and sport clearance around month 9, keep you moving forward without overrunning tissue biology.
Stay patient, track your wins, and respect pain signals, the tendon keeps remodeling for a full year. If you’re in Richmond or anywhere in Central Virginia, the specialists at Achilles Foot and Ankle Center can tailor each phase to your goals, from bracing choices to performance testing. Ready for personalized achilles tendon rupture recovery guidance? Schedule your evaluation today at our Achilles Foot and Ankle Center clinics.


[…] requires careful work to preserve remaining bone. Recovery mirrors your first surgery, with protected weight-bearing and physical therapy. Some patients need bone grafting if significant bone stock has been lost […]