That small, hardened bump on your toe or the ball of your foot might not seem like a big deal, until every step reminds you it’s there. Corns develop when skin thickens in response to repeated friction or pressure, and they’re one of the most common foot complaints we see at Achilles Foot and Ankle Center. The good news? Most people can learn how to treat corns on feet at home with a few simple supplies and the right technique.
Before you grab a razor blade or dig at it with whatever’s handy, know this: improper removal can cause infection, open wounds, or make the corn worse. That’s especially true if you have diabetes, poor circulation, or neuropathy, conditions our podiatrists in Central Virginia treat every day. A careful, step-by-step approach matters.
This guide walks you through safe home methods, soaking, filing, padding, and moisturizing, along with over-the-counter options that actually work. You’ll also learn when a corn needs professional attention and how to keep it from coming back. Let’s get your feet comfortable again.
What a foot corn is and when to see a podiatrist
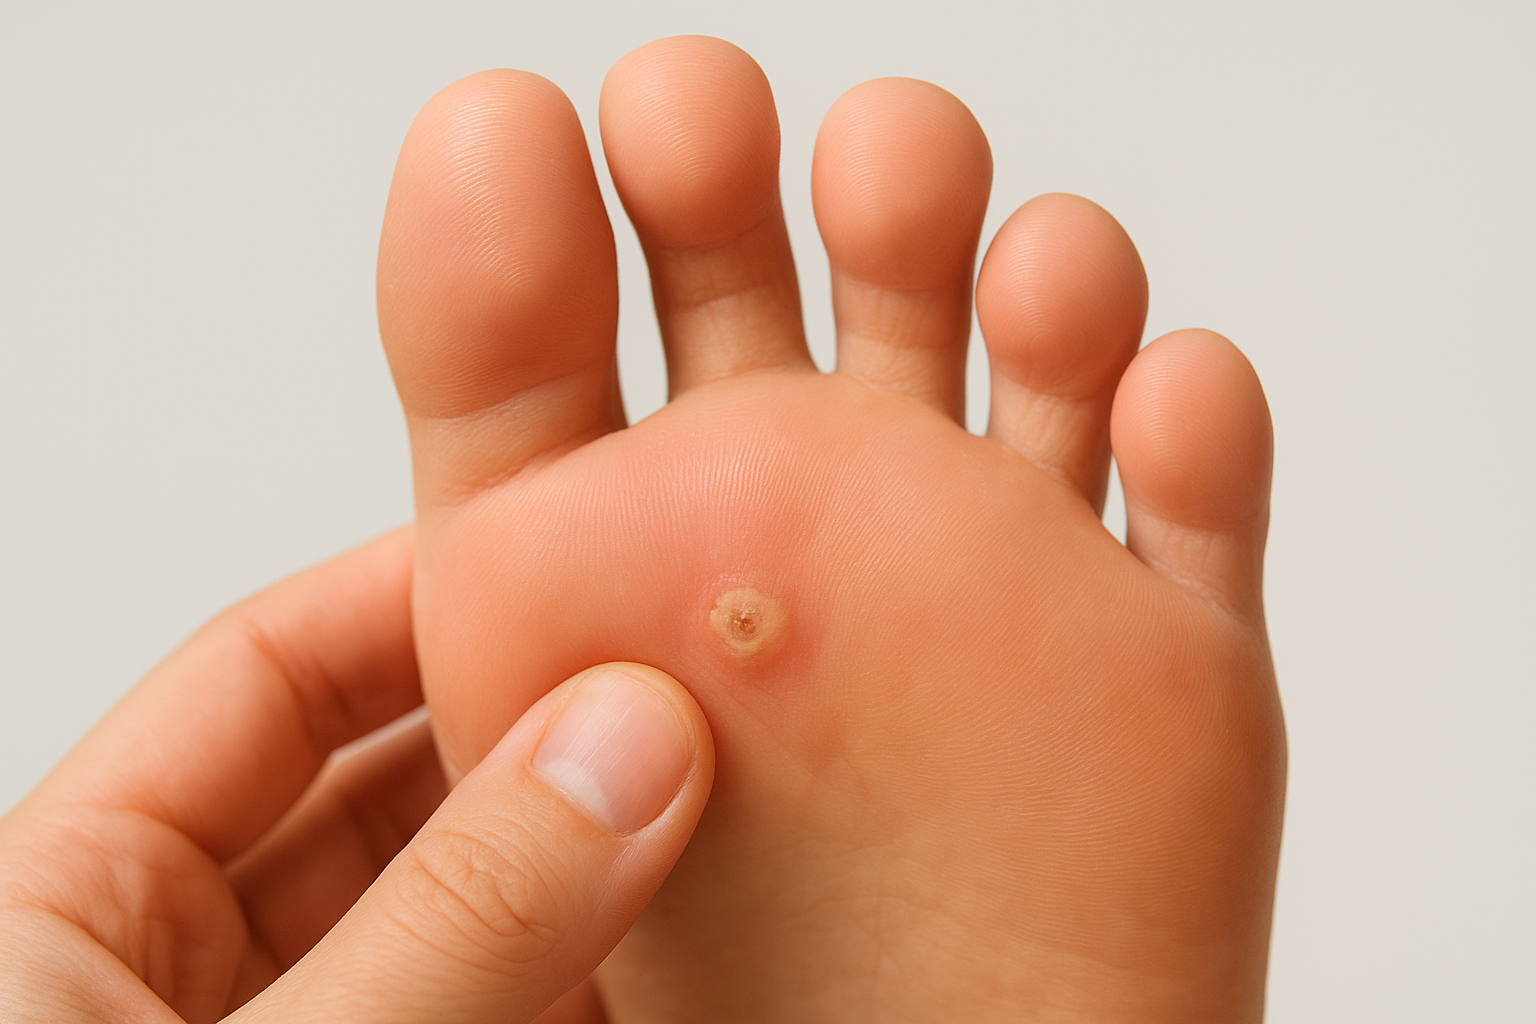
A corn is a concentrated area of thickened skin that your body builds up as a defense against repeated friction or pressure. Unlike a callus, which spreads across a broader surface, a corn is small, round, and has a hard central core that can press into deeper tissue and cause sharp pain. They most often form on the tops and sides of toes, between toes, and on the ball of the foot.
What corns actually look like
You can usually identify a corn by its raised, waxy, or translucent center surrounded by inflamed or thickened skin. Pressing directly on it produces a deep, focused pain that feels different from general soreness. Hard corns tend to appear on bony areas like the tops of toes, while soft corns form between the toes where moisture keeps the skin pliable and pale. A third type, the seed corn, shows up as a cluster of tiny pits on the sole of the foot and is often painless until weight is applied.
| Corn Type | Location | Texture | Common Cause |
|---|---|---|---|
| Hard corn | Tops or sides of toes | Firm, dry, dense core | Tight shoes, bony prominences |
| Soft corn | Between toes | Moist, rubbery | Friction between toes, narrow toe box |
| Seed corn | Sole of foot | Small, multiple pits | Dry skin, blocked sweat ducts |
How corns differ from warts and calluses
Corns and warts are frequently mistaken for each other, but they are different conditions with different treatments. If you squeeze the sides of the bump and feel pain, it is likely a wart. If you press down from the top and feel pain, it is more likely a corn. Calluses, on the other hand, cover a wider area, lack a defined core, and are usually painless. Getting the identification right matters before you start any home treatment.
When to stop treating at home and call a podiatrist
Home treatment works well for most straightforward corns, but certain situations call for professional care. If you have diabetes, peripheral neuropathy, or poor circulation, do not attempt to treat a corn at home. Reduced sensation means you may not notice if you cut too deep or cause an infection, and a small wound can escalate quickly.
If a corn bleeds, shows signs of infection such as redness spreading beyond the site, warmth, or discharge, or if it has not improved after several weeks of consistent home care, book an appointment with a podiatrist.
You should also seek help if the corn keeps returning despite changing your footwear, since that usually means there is an underlying structural issue like a hammertoe or bunion driving the pressure. A podiatrist can correct the root cause rather than just the surface symptom.
Step 1. Soak and soften the skin
Soaking is the foundation of safe corn removal. When you soak your foot, you hydrate and loosen the thickened skin so it becomes pliable enough to file down without tearing or causing pain. This is the first step when learning how to treat corns on feet at home, and skipping it leads to rough filing that irritates the skin and slows healing significantly.
What to soak your foot in
Warm water works well on its own, but adding Epsom salt (magnesium sulfate) can help draw out inflammation and soften tissue more effectively. Fill a basin with warm water, keeping the temperature comfortable enough to hold your hand in for 30 seconds. Add two tablespoons of Epsom salt per gallon of water, stir until dissolved, then submerge your foot completely. Avoid hot water because it strips the skin of its natural oils and leaves surrounding tissue dry and more prone to cracking.
If the water feels too hot for your hand, it is too hot for your foot. Aim for the same temperature you would use for a relaxing bath.
How long to soak and what to do after
Soak your foot for 15 to 20 minutes. That is long enough to soften the corn without over-hydrating the surrounding healthy skin. If the corn sits on the sole or between your toes, keep the entire affected area fully submerged for the whole session. You can repeat this once daily while you are actively treating the corn.
After soaking, pat your foot completely dry with a clean towel, making sure to get between every toe. Leaving moisture trapped between toes creates conditions that favor fungal growth, which complicates healing. Work gently around the corn itself so you do not rub away skin that is not yet ready to come off, then move on to the filing step while the skin is still soft.
Step 2. File safely and moisturize daily
Once your skin is soft from soaking, filing becomes straightforward and controlled. The goal is to gently remove the outermost dead layers of the corn without disturbing healthy tissue underneath. This is one of the most important steps when figuring out how to treat corns on feet at home, and doing it carefully and consistently makes the difference between steady progress and accidentally irritating the area.
How to file a corn without hurting yourself
Use a pumice stone or a fine-grit emery board, not a metal file, razor, or any sharp cutting tool. Metal tools remove too much skin too quickly, and sharp edges create a real risk of cutting into live tissue. With a pumice stone, apply light, circular strokes in one direction over the corn. You are aiming to thin the hard layer gradually, not to remove the entire corn in one session.
Never file deeper than the outermost layer of dead skin in a single session. Multiple short sessions over several days are safer and more effective than one aggressive attempt.
Follow these steps each time you file:
- File only after soaking while the skin is still soft.
- Use light pressure and short strokes, about 10 to 15 passes.
- Stop if you see any pink skin or feel sharp pain.
- Rinse the area and pat completely dry before applying moisturizer.
Why moisturizing matters after every session
Applying a thick, urea-based cream immediately after filing locks in the softness you created during soaking and prevents the thickened skin from hardening again between sessions. Urea concentrations of 20 to 40 percent work well for corns because urea breaks down the protein bonds holding hardened skin together. Apply the cream directly to the corn and the surrounding area, then pull on a clean cotton sock to help absorption overnight.
Skipping moisturizer allows the surface skin to dry out quickly, which causes cracking and makes the corn more painful and resistant to the filing you do in the next session.
Step 3. Pad the area and remove the pressure
Soaking and filing reduce the corn’s size, but padding addresses the underlying pressure that caused it in the first place. Without relieving that friction, the corn will simply rebuild itself, no matter how carefully you file. This step is essential to any complete approach to how to treat corns on feet at home, and it protects the area while healing continues.
Padding does not just protect a sore spot. It actively interrupts the cycle of friction that keeps the corn growing back.
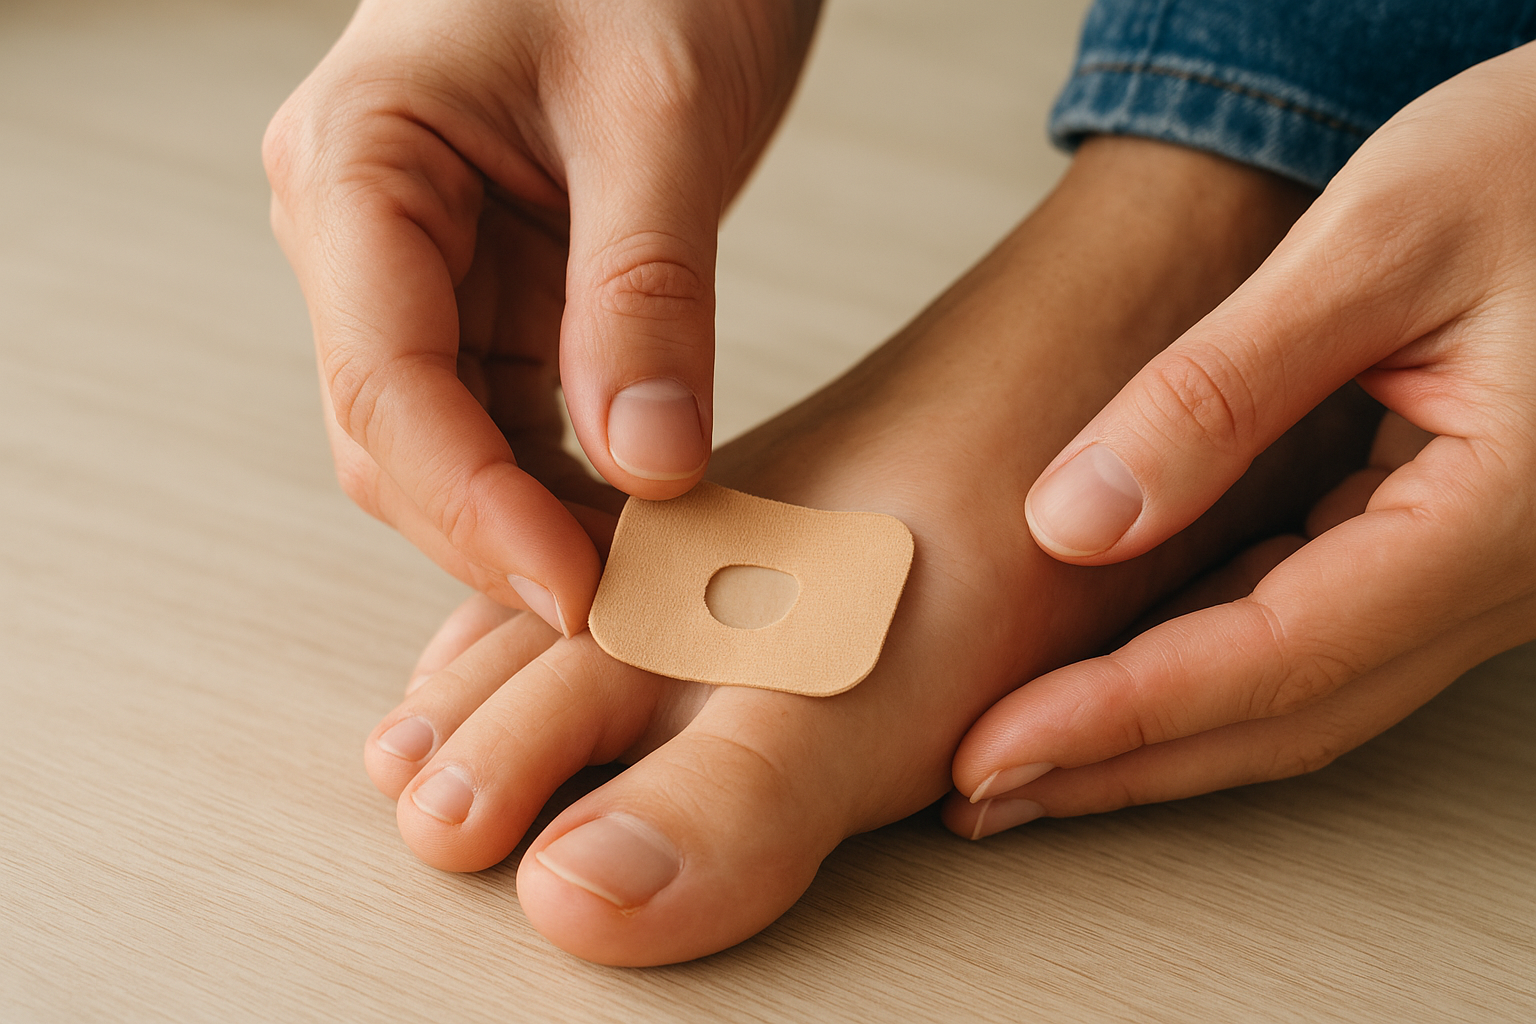
Choose the right padding material
Moleskin and non-medicated corn pads are your two most practical options. Moleskin is a soft, adhesive fabric you cut to shape and apply around the corn, creating a raised border that deflects pressure away from the sensitive center. Non-medicated donut-shaped pads do the same thing with a pre-cut hole that sits directly over the corn. For soft corns between the toes, small foam toe separators or silicone toe sleeves work better because they keep the toes apart, eliminating the friction that creates those corns specifically.
| Material | Best For | Notes |
|---|---|---|
| Moleskin sheets | Hard corns on toes or ball of foot | Cut to shape, leave hole over corn |
| Donut-shaped corn pads | Hard corns needing direct cushioning | Pre-cut, easy to apply |
| Foam toe separators | Soft corns between toes | Keeps toes apart during the day |
| Silicone toe sleeves | Soft corns with frequent rubbing | Reusable, stays in place inside shoe |
How to apply padding correctly
Clean and dry your foot completely before applying any pad so the adhesive holds. Cut moleskin into a shape slightly larger than the corn, then cut a small hole in the center so the pad sits around the corn rather than on top of it. Press it firmly against your skin for 30 seconds to activate the adhesive, then replace it daily or sooner if it shifts, gets wet, or loses adhesion.
After padding, reassess your footwear immediately. Shoes with a roomy toe box and adequate cushioning reduce the pressure driving corn formation in the first place, making your pads far more effective.
Step 4. Use OTC treatments safely or skip them
Over-the-counter corn treatments are widely available, but they are not automatically the right choice for every situation. When you are working out how to treat corns on feet at home, knowing whether to use these products or leave them out of your routine can protect you from unnecessary skin damage. Used correctly, certain OTC options speed up the process; used carelessly, they create chemical burns on healthy skin.
When salicylic acid actually helps
Salicylic acid is the active ingredient in most OTC corn removal products, including liquids, gels, pads, and plasters. It works by dissolving the keratin protein that makes up the hardened layers of the corn, gradually breaking down the thickened tissue over several days of consistent application. The standard concentration in over-the-counter products is 17 percent, which is effective for most surface-level hard corns when you follow the directions precisely.
Apply salicylic acid only to the corn itself, not to the surrounding healthy skin, which the acid will irritate and break down in the same way it breaks down the corn.
Follow these steps for safe salicylic acid application:
- Soak and dry your foot completely before each application.
- Use a cotton swab or the included applicator to coat only the corn’s surface.
- Let the product dry fully before putting on a sock or shoe.
- Apply once daily for no more than two weeks unless the packaging specifies otherwise.
- Stop immediately if the surrounding skin turns red, raw, or blistered.
Who should skip OTC treatments entirely
If you have diabetes, neuropathy, or poor circulation, skip salicylic acid products completely. Your skin may not respond to chemical irritation the way healthy skin does, and a minor reaction can progress to an open wound without you feeling it. Children and anyone with sensitive or broken skin around the corn should also avoid these products and rely on soaking, filing, and padding alone.
Liquid salicylic acid products are harder to control than medicated pads, so if you are new to OTC corn treatment, a pre-cut pad with a built-in adhesive ring gives you the most reliable coverage without risk of spreading the acid.

Keep your feet comfortable
When you focus on soaking, filing, padding, and moisturizing consistently, most corns resolve within a few weeks without any professional intervention. The key is removing the pressure source, whether that means switching to shoes with a wider toe box, wearing cushioned insoles, or adding a silicone sleeve to a problem toe. Learning how to treat corns on feet at home comes down to patience and repeating these steps daily rather than rushing the process.
Preventing a new corn is simpler than treating one. Check your shoes for tight seams or narrow toe boxes that press against your toes, and replace worn-out footwear that no longer provides adequate support. If a corn keeps returning even after you’ve adjusted your shoes and followed every step in this guide, an underlying bone structure issue is likely driving the pressure. A podiatrist can identify that cause and fix it for good. Book a same-day appointment and get lasting relief.