

You noticed a sore on your foot that isn’t healing the way it should, and now you’re searching for answers before your next appointment. Home care for diabetic foot ulcer management makes a real difference in how fast that wound closes and whether it stays infection-free, but doing it wrong can turn a small sore into a limb-threatening problem within weeks. This guide gives you the practical steps you need right now.
If you’re wondering how to care for a diabetic foot ulcer at home, the short answer is: keep it clean, keep pressure off it, change the dressing correctly, and watch for warning signs daily. Diabetic foot sore care isn’t complicated once you know the routine, but every step matters because neuropathy often hides pain that would normally warn you something is wrong.
Below, we walk through cleaning technique, dressing selection, offloading methods, and the specific signs that mean you need to call your podiatrist immediately. At Achilles Foot and Ankle Center, our diabetic foot care team sees these ulcers every day across our Central Virginia clinics, and this guide reflects what actually works between your appointments to protect your foot and avoid unnecessary complications.
Understanding your diabetic foot ulcer before you begin
A diabetic foot ulcer forms when high blood sugar damages nerves and blood vessels over time, cutting off the early warning signals your body normally sends when skin breaks down. Peripheral neuropathy means you might not feel a blister forming inside your shoe until it’s already an open wound, and poor circulation means your body struggles to deliver the oxygen and nutrients needed to close that wound once it appears. This combination is why a sore that would heal in days on someone without diabetes can linger for weeks or months, and why it needs a different kind of attention than a typical cut or scrape.
Know what you’re dealing with
Before you start any home care for diabetic foot ulcer treatment, take a clear look at the wound itself. Ulcers are commonly graded by depth, from superficial sores that only affect the top layer of skin to deeper wounds that expose tendon, bone, or joint. Depth matters because it determines whether home care alone is appropriate or whether you need a podiatrist involved from day one.
A diabetic ulcer that exposes bone or shows black tissue is never a home care situation, it’s an emergency.
When home care is appropriate
Home management works best for ulcers that are:
- Shallow, affecting only skin or the layer just beneath it
- Free of visible bone, tendon, or deep tissue
- Not showing pus, foul odor, or spreading redness
- Already evaluated by a podiatrist who has given you a specific care plan
Surgical or advanced wound care becomes necessary when the ulcer is deep, infected, or not responding to weeks of proper home treatment. Our Advanced Wound Care & Limb Salvage program exists specifically for these tougher cases, so if your wound doesn’t fit the list above, learn how to choose a limb salvage program and start treatment instead of waiting.
Gathering your supplies ahead of time also keeps you from improvising with whatever’s in the medicine cabinet. Stock saline solution, sterile gauze, medical tape, non-latex gloves, and whatever dressing your podiatrist recommended before you start. Having everything within reach reduces the temptation to touch the wound with unwashed hands or skip a step because a supply is missing. Once you understand your ulcer’s severity and have your supplies ready, you’re prepared to move into the actual cleaning and dressing routine.
Step 1. Clean the wound safely
Washing your hands thoroughly comes first, every single time, before you touch the dressing or the wound itself. Bacteria from unwashed hands is one of the most preventable causes of a diabetic foot sore turning into a serious infection, so don’t skip this step even when you’re in a hurry. Use soap and warm water, dry completely, and put on non-latex gloves if your podiatrist recommended them for your specific wound.
Remove the old dressing gently, pulling in the direction of hair growth rather than against it, and stop if you notice it’s stuck to the wound bed. Soaking a stuck dressing in saline for a minute or two loosens it without tearing new tissue away. Sterile saline solution is the gold standard for rinsing, not hydrogen peroxide or alcohol, since those actually damage healthy cells trying to close the wound.
Never use hydrogen peroxide or alcohol on a diabetic foot ulcer, they kill the healthy cells your wound needs to heal.
Here’s the cleaning sequence to follow at each dressing change, which mirrors the step-by-step way to clean, dress, and protect any foot wound:
- Wash and dry your hands, then put on gloves.
- Remove the old dressing carefully.
- Rinse the wound with saline, working from the center outward.
- Pat the surrounding skin dry with clean gauze, never rubbing directly on the ulcer.
- Inspect the wound bed and edges before applying a new dressing.
Avoid soaking your entire foot in a basin, since that softens skin in ways that raise infection risk rather than lowering it. Following the American Diabetes Association’s wound care guidance alongside your podiatrist’s specific instructions keeps you from relying on outdated advice you might find elsewhere.
Step 2. Choose and apply the right dressing
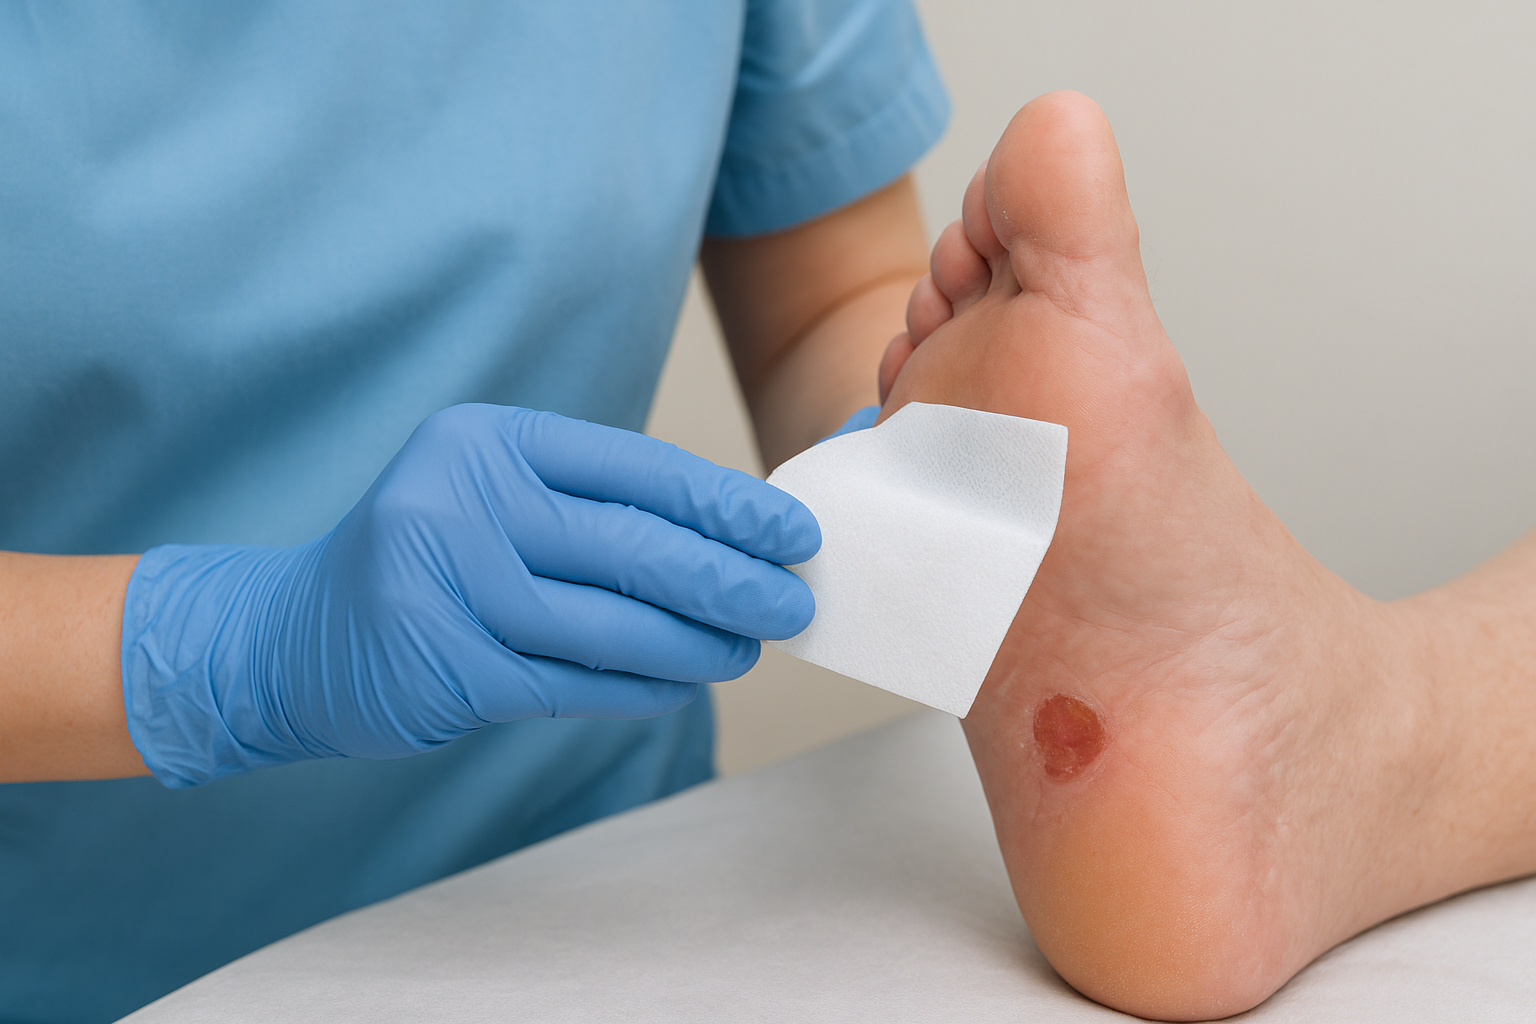
Moisture balance decides how fast your ulcer closes, so the dressing you choose matters as much as the cleaning itself. Too much moisture invites maceration and breaks down healthy skin at the wound edges, while a dressing that’s too dry lets the wound bed crust over and slows new tissue growth. Your podiatrist should have already told you which type fits your ulcer, but understanding the best diabetic wound dressings by wound condition helps you apply it correctly instead of guessing.
Matching dressing type to wound condition
Different ulcers call for different materials, and using the wrong one can stall healing for weeks, so it helps to know the 15 types of wound dressings and when to use each one.
| Dressing type | Best for | Change frequency |
|---|---|---|
| Foam | Moderate to heavy drainage | Every 1-3 days |
| Hydrogel | Dry wounds needing moisture | Every 1-2 days |
| Alginate | Heavy drainage, packing deep wounds | Daily |
| Hydrocolloid | Light drainage, shallow ulcers | Every 3-5 days |
The right dressing keeps a wound moist enough to heal, never wet enough to break down.
Applying it correctly
Center the dressing directly over the ulcer without letting the adhesive edges touch broken skin, since tape pulling on fragile tissue at each change causes fresh damage. Secure it with medical tape or a wrap your podiatrist approved, making sure it’s snug but not tight enough to restrict circulation, which is already compromised in most diabetic feet. Skipping a scheduled change because the dressing
Step 3. Offload pressure and protect your foot
Pressure is the enemy of a healing ulcer, and it’s often invisible because neuropathy hides the pain signals that would normally make you shift your weight. Every step you take on an unprotected foot presses more force into the wound bed, breaking down the fragile tissue your body just built. Offloading, the practice of removing weight from the ulcer site, is what separates a wound that closes in weeks from one that lingers for months.
Offloading devices that actually work
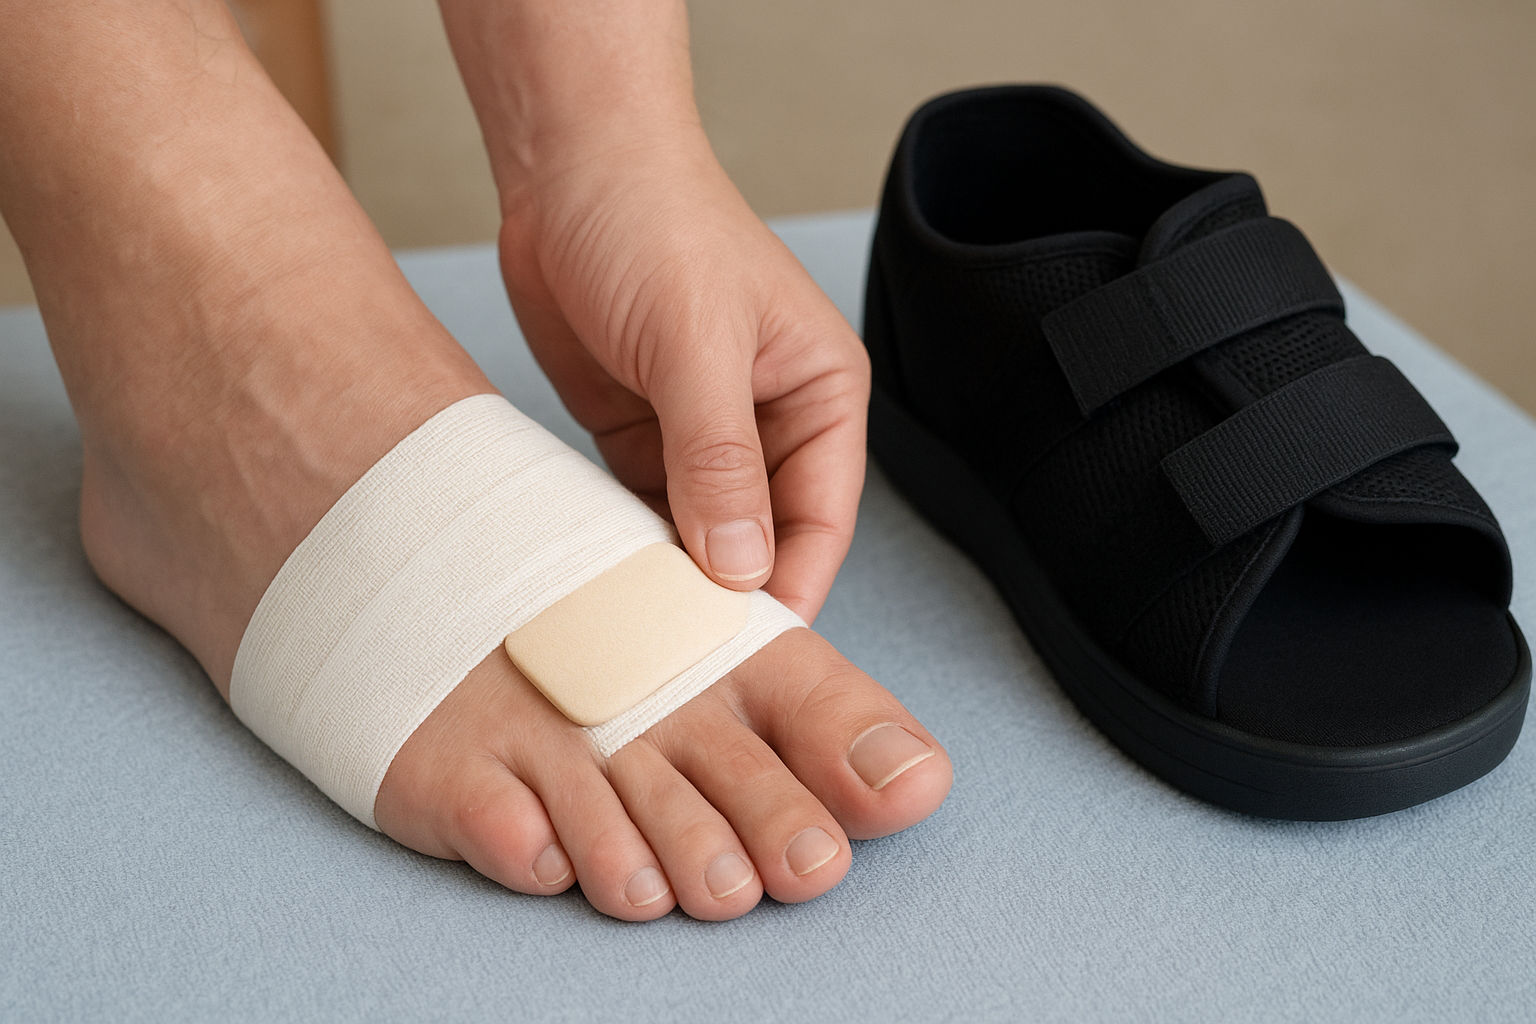
Your podiatrist will recommend a specific device based on the ulcer’s location and your activity level. Common options include:
- Total contact casting for offloading, considered the gold standard for plantar ulcers
- Removable cast walkers, offering similar pressure relief with more convenience
- Custom orthotics or diabetic shoes, useful once the wound is closing and prevention becomes the goal
- Felt or foam padding, applied directly around the ulcer to redirect pressure
Skipping offloading is the single fastest way to undo weeks of careful dressing changes.
Regardless of which device you’re using, wear it consistently, even for short trips to the mailbox, since a few unprotected steps daily add up to real setbacks.
Protecting your foot between changes
Staying off your feet as much as possible during active healing matters just as much as the device itself. Swap standing tasks for seated ones when you can, and keep your foot elevated while resting to reduce swelling. Transitioning to diabetic shoes covered by Medicare once your podiatrist clears you helps prevent the next ulcer from forming in the same spot.
Step 4. Monitor healing and know when to call a podiatrist
Tracking your ulcer’s progress daily gives you the earliest possible warning if something’s going wrong, and it’s the part of home care for diabetic foot ulcer management that people skip most often once the routine feels familiar. Take a photo at each dressing change under the same lighting, since a picture catches gradual changes in size or color that memory alone will miss. Expect steady, small improvements week to week, not overnight transformation, and knowing the phase-by-phase wound healing timeline keeps you from panicking over minor fluctuations in drainage color as long as the trend is toward smaller and shallower.
What healthy healing looks like
A healing ulcer shows pink or red granulation tissue, shrinking edges, and decreasing drainage over time. Wound measurements taken weekly, length, width, and depth, give you objective proof of progress instead of guesswork.
If your wound looks the same or worse after two weeks of proper care, that’s your signal to call, not wait longer.
Warning signs that mean call today
Some changes point toward infection and mean you shouldn’t wait for your next scheduled visit, since chronic wound infections need targeted treatment. Call your podiatrist immediately if you notice:
- Increased redness spreading beyond the wound edges
- Foul odor or new, thick discharge
- Fever, chills, or feeling generally unwell
- Black or gray tissue appearing in the wound
- Increased pain, or pain returning after previously feeling numb
Offering same-day appointments for exactly these situations, our team would rather see you the same afternoon than have you wait until a small setback becomes a hospital admission.
Keeping your feet on the path to healing
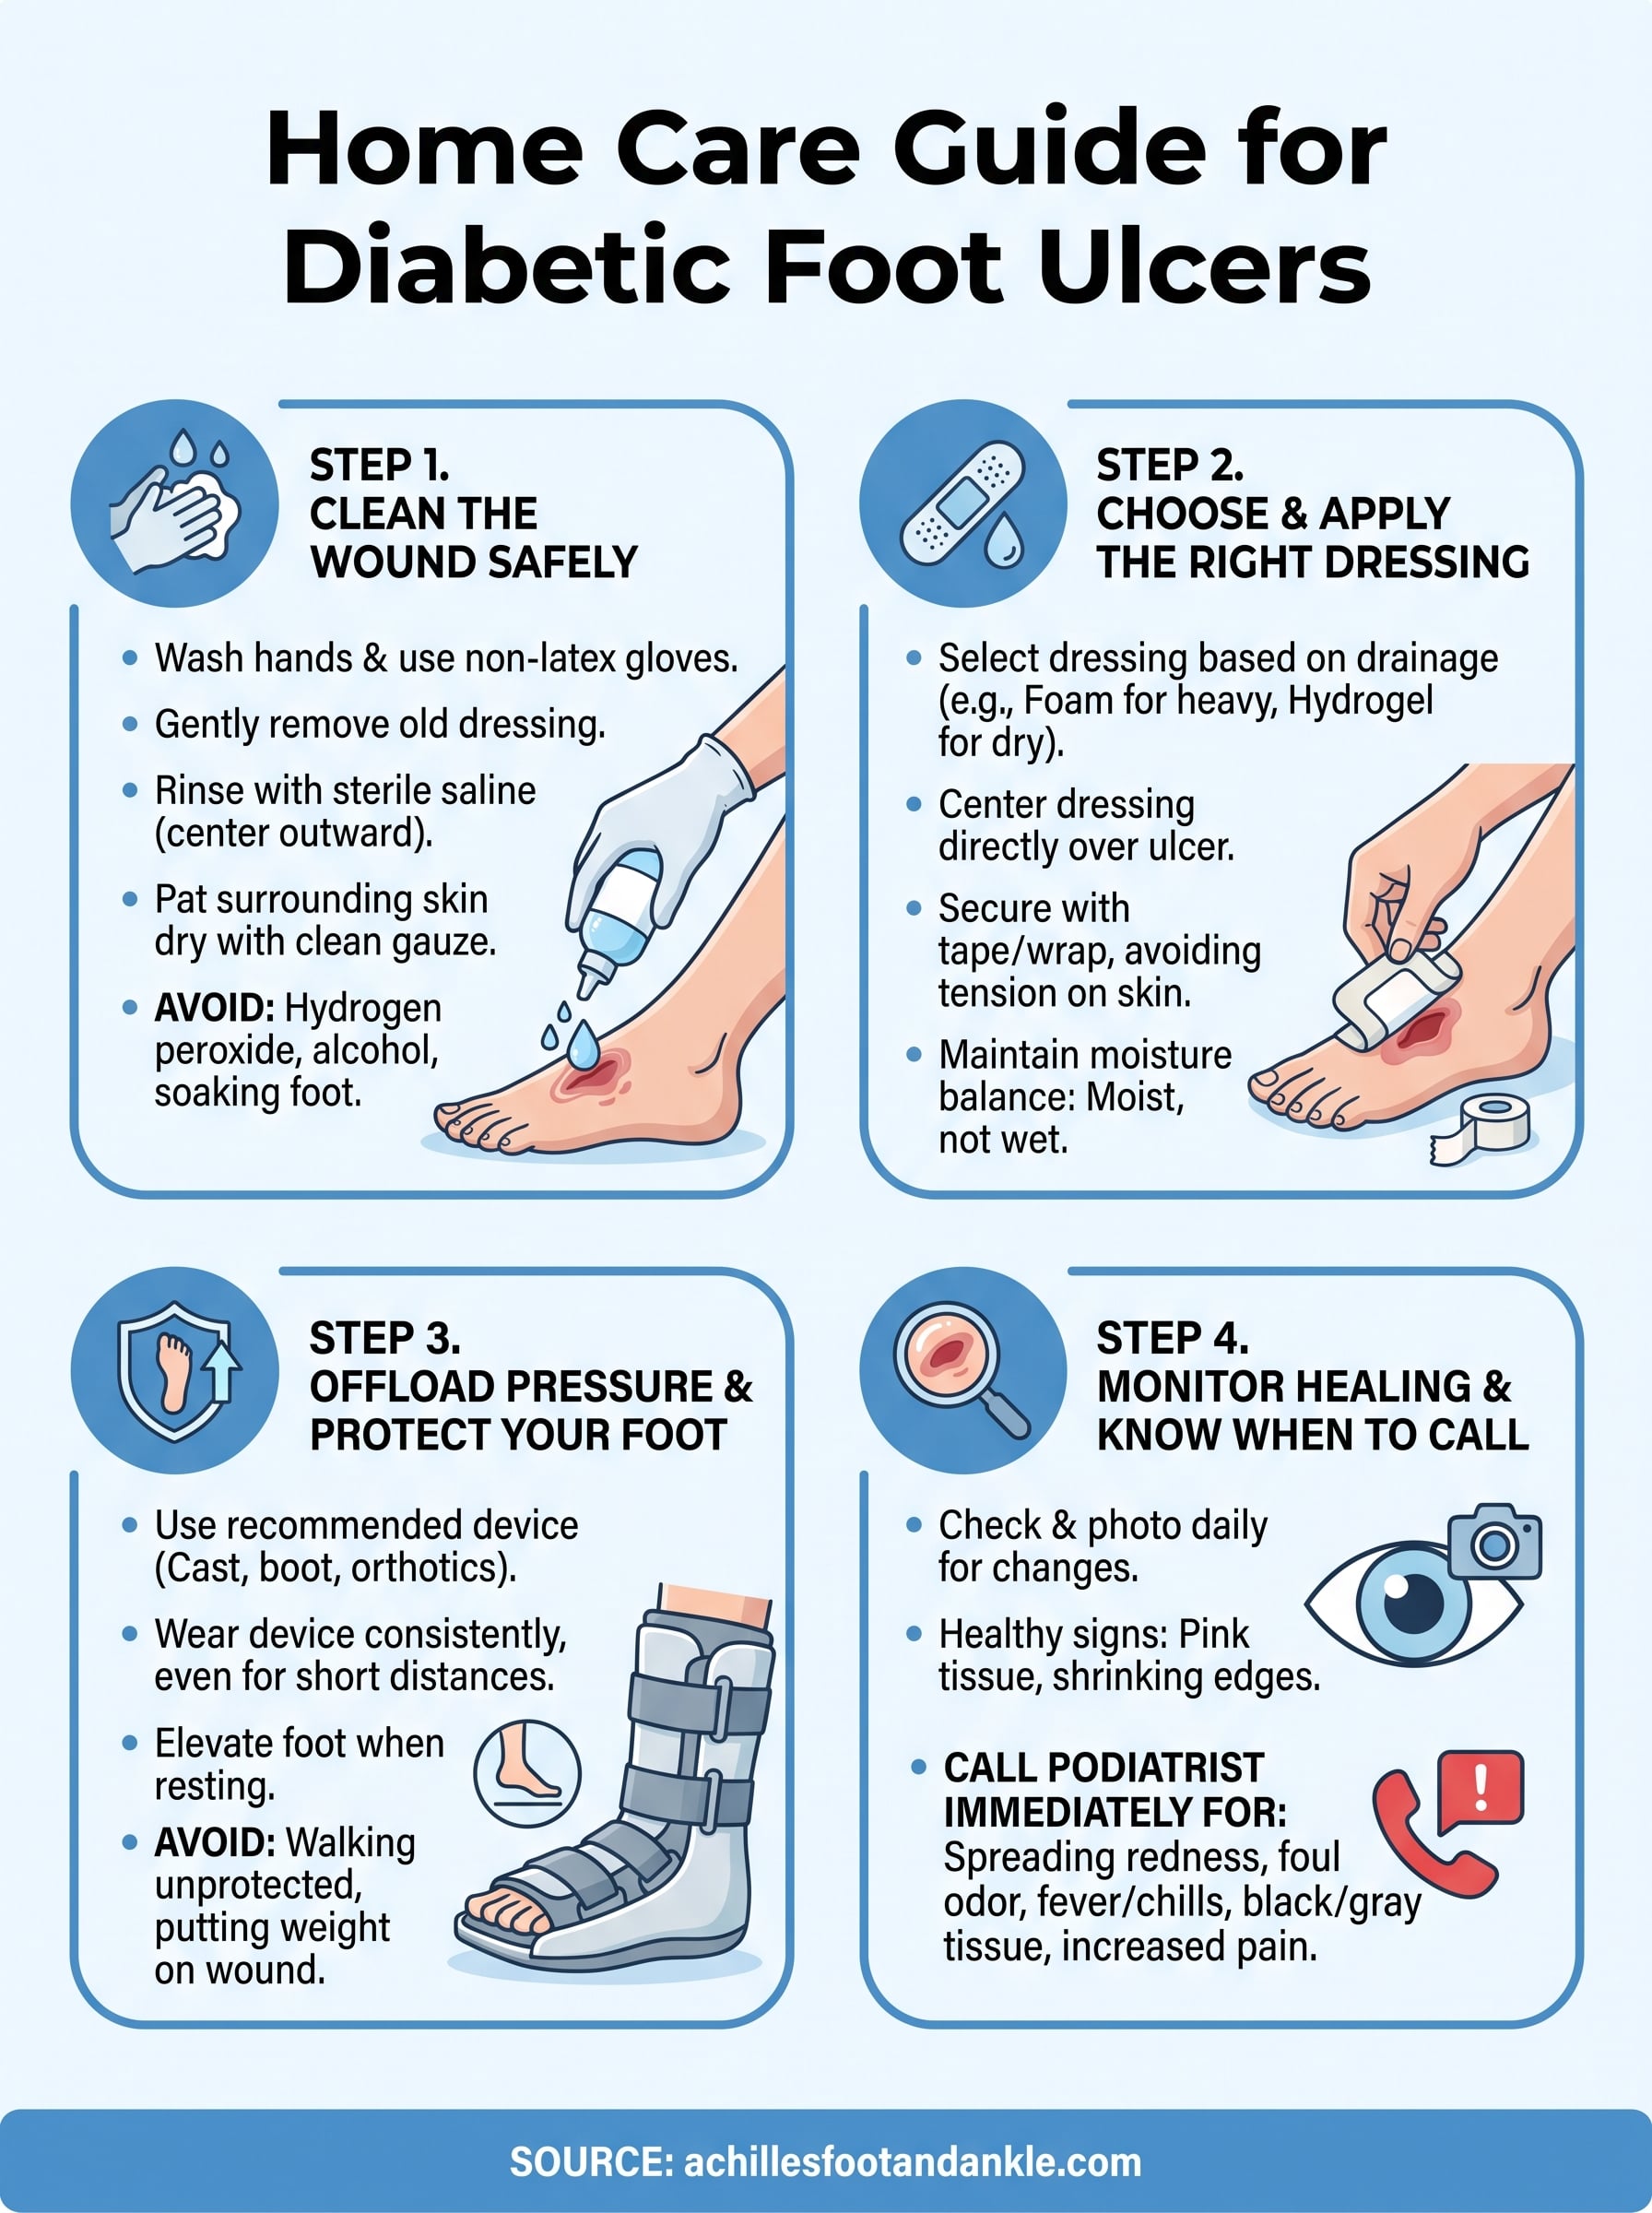
Healing a diabetic foot ulcer at home comes down to four habits done consistently: clean technique, the right dressing, real offloading, and daily monitoring. Consistency matters more than perfection, so if you miss a step or notice something off, don’t panic, just get back on track and watch closely over the next day or two. Skipping any one of these steps, especially offloading, is how a manageable sore turns into a months-long problem or worse.
You know your foot better than anyone, and trusting your own observations is part of good care. If healing stalls, warning signs appear, or you’re simply unsure whether what you’re seeing is normal, don’t wait it out. Our team specializes in exactly these situations across Central Virginia, and catching a problem early is always easier than treating one that’s spread. Schedule a same-day wound evaluation if anything about your foot ulcer concerns you today.